Friday 28 November 2014

One Bite Banana Cake with Coconut Custard 一口椰汁奶黃香蕉蛋糕

My friend was visiting us from Hong Kong and I said I will throw him a big party upon his arrival on FB before. I, my friend Christine and Chef Joe are planning for the party. And Christine decided we will have a Malaysian theme for our menu. I picked banana and coconut as main ingredients for my dessert.  And I will need to pick something that can easily served and enough for 30+ people. I started the research and found this recipe. The original recipe is for 8x250ml individual size cake. I changed a bit to make it one-bite size. 

Ingredients (Around 32-36 mini cupcakes one-bite size)

200 g unsalted butter, softened
200 g brown sugar
2 eggs
350 g (about 3) mashed bananas
200 g self-raising flour
1¼ tsp baking soda


Topping

150 g brow n sugar
2 bananas, sliced into 24


Coconut custard (I use only half of this recipe for 28-30 bite size cakes)

300 ml thickened cream
300 ml coconut milk
110 g  caster sugar
2 egg yolks
1 tsp vanilla extract

Instructions

Step 3
  1. To make coconut custard, place cream and coconut milk in a saucepan over medium–high heat and bring to just below boiling point.
  2. Place caster sugar, egg yolks and vanilla in a bowl, whisking to combine. Slowly add cream mixture, whisking constantly, then pour into a clean saucepan over medium heat. Cook, stirring, for 5 minutes or until custard is thick enough to coat the back of a spoon. Cool to room temperature, then cover surface with plastic w rap and chill until needed.
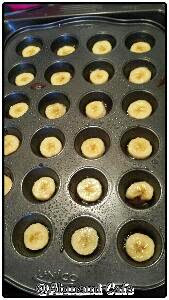
  3. Preheat oven to 180°C. Grease 30 mini cupcakes pan. To make topping, place brown sugar and 1 tbsp water in a small saucepan over low heat, stirring to dissolve. Divide among prepared cupcake holes, then arrange 1 banana slice in base of each. Set aside.
  4. Using an electric mixer, beat butter and brown sugar until pale and fluffy. Add eggs one at a time, beating well after each addition.
  5. Beat in mashed bananas, then fold in flour and baking soda. Divide batter among cupcake holes, 
  6. Place mini cupcake pan in a deep baking dish and pour in enough boiling water to come halfway up sides of pan. Bake for 25 minutes or until a skewer inserted in centre comes out clean. Turn out and serve with coconut custard.
Recipe adapted from: http://www.sbs.com.au/food/recipes/steamed-banana-cakes-coconut-custard-apam-pisang

Tofu Ice Cream 豆腐雪糕

Ingredients:
Egg Yolks 3
Sugar 80g (I use 50g)
Silken Tofu (Extra smooth) 200g
Unsweetened Soya Drinks 100g
Whipping cream 200ml


Directions
If you use ice cream machine, remember to put the inner part to freezer to freeze until it is completely frozen (shake it to make sure the liquid between wall are all frozen with no sound).  

1 Put Tofu and Soya drinks in food processor and blend. 

Put the egg yolks into a bowl with sugar and beat with an electric hand beater for about 2 minutes until the mixture has thickened, is paler in colour and falls in thick ribbons when you lift the beaters.

Heat the cream and soya tofu over a low heat, stirring occasionally, until it almost boils – you’ll see a few bubbles at the edge. Take off the heat and stir in the egg yolk mixture.

Return the pan to a low heat and cook, stirring all the time with a wooden spoon, for 8-10 minutes, until the custard is thick enough to coat the back of the spoon. Watch that it doesn’t boil – as soon as you see any bubbles about to burst to the surface, it should be thick enough, so take the pan off the heat so the mixture doesn’t curdle.

5. Pour the custard into a heatproof bowl, then sit it in a bigger bowl one third full of iced water to cool (this takes about 20 minutes). Stir occasionally to stop a skin forming. Put the bowl of custard in the fridge for 3-4 hours, preferably overnight, so it gets really cold.

4 Pour into ice cream maker and mix for 30 mins or according to your ice cream maker directions. 

5 Cover it with plastic wrap and place in freezer. Serve until set.


蛋黃 3隻 
糖 80g ( 太甜,我諗減到40-50g差不多 ) 
豆腐 200g ( 我用百福蒸煮滑豆腐2盒裝的1盒 ) 
低糖豆漿 100g ( 代替牛奶,等佢豆味重些,可以的話用無糖豆漿會更易控制甜度 )
忌廉 200ml  

做法:
1)  用攪拌機將豆腐同豆漿攪成豆腐漿 
2) 蛋黃同糖,以打蛋器打至cream狀。(可以增加空氣、加熱時平均受熱 )
3) 將豆腐漿+忌廉同蛋黃醬混合拌勻
4) 以小火加熱 ( 整雪糕要加熱是因為蛋要消毒同去腥,呢款豆腐都要煮;但唔好俾佢高過80度 / 滾,否則蛋會熟!! ) 
5) 離火冷卻 ( 可以水 / 冰加速 )
6) 以篩網過濾令其更幼滑 ( optional)
7) 放入雪糕機
8) 冰櫃3小時


Recipe adapted from (Chinese): http://weshare.hk/fairyling/articles/2590848

Monday 10 November 2014

Toy Story Theme Cake and Cupcakes 反斗奇兵(玩具總動員)蛋糕

Last year, I made a "Dusty" the plane fondant cake for my friend's son 4th birthday. Time flies, another year comes. I am so Happy that my friend asked me to make her sons a cake for their combined birthday party this year again. She is planning to throw her sons a big birthday party at Fun for Kidz at Aberdeen Centre. 20+ kids plus 30+ adults. After our discussion on cake idea, we decided to serve kids cupcakes and adult's guests cake pieces. And the theme for this year party will be "Toy Story". Her son Lukas and Markus both like Woody and Buzz Lightyear.  Therefore I use these two characters as theme of my cake. The figurines appeared on the cake and the cupcake sticks decorations were store bought and provided by my friend. So all I need is to make a 2 tiers chocolate fondant cake (8" & 6") and cupcakes with buttercream only.

Chocolate Cake Base 

(sources from Allrecipes.com)

(This recipe becomes my all time favorite. It is moist, easy to make and full of chocolate flavor)

Ingredients: (Good for 3x6" round or 2x8" round or 30-34 cupcakes)

(Cake is ready in 1 hour)
  • 2 cups white sugar (I use 1 1/2 cup only)
  • 1 3/4 cups all-purpose flour
  • 3/4 cup unsweetened cocoa powder (I use 1 cup to increase the chocolate taste)
  • 1 1/2 teaspoons baking powder
  • 1 1/2 teaspoons baking soda
  • 1 teaspoon salt 
  • 2 eggs
  • 1 cup milk
  • 1/2 cup vegetable oil
  • 2 teaspoons vanilla extract
  • 1 cup boiling water

Directions

  1. Preheat oven to 350 degrees F (175 degrees C). Grease and flour two nine inch round pans.
  2. In a large bowl, stir together the sugar, flour, cocoa, baking powder, baking soda and salt. Add the eggs, milk, oil and vanilla, mix for 2 minutes on medium speed of mixer. Stir in the boiling water last. Batter will be thin. Pour evenly into the prepared pans.
  3. Bake 40-45 minutes in the preheated oven, until the cake tests done with a toothpick. Cool in the pans for 10 minutes, then remove to a wire rack to cool completely. (15-20 minutes for cupcakes)


Marshmallow Fondant

Ingredients:

  • 8 ounces miniature marshmallows (4 cups not packed, or half of a 16-ounce bag)
  • 1 pound powdered sugar (4 cups), plus extra for dusting
  • 2 tbsp water
  • Food coloring or flavored extracts, optional

Preparation:

1. Dust your counter or a large cutting board with powdered sugar. Place the marshmallows and the water in a large microwave-safe bowl. Microwave on high for 1 minute, until the marshmallows are puffy and expanded.
2. Stir the marshmallows with a rubber spatula until they are melted and smooth. If some unmelted marshmallow pieces remain, return to the microwave for 30-45 seconds, until the marshmallow mixture is entirely smooth and free of lumps. If you want colored or flavored fondant, you can add several drops of food coloring or extracts at this point and stir until incorporated. If you want to create multiple colors or flavors from one batch of fondant, do not add the colors or flavors now. Instead, refer to step 6 below for instructions.
3. Add the powdered sugar and begin to stir with the spatula. Stir until the sugar begins to incorporate and it becomes impossible to stir anymore.
4. Scrape the marshmallow-sugar mixture out onto the prepared work surface. It will be sticky and lumpy, with lots of sugar that has not been incorporated yet--this is normal. Dust your hands with powdered sugar, and begin to knead the fondant mixture like bread dough, working the sugar into the marshmallow with your hands.
5. Continue to knead the fondant until it smoothes out and loses its stickiness . Add more sugar if necessary, but stop adding sugar once it is smooth--too much sugar will make it stiff and difficult to work with. Once the fondant is a smooth ball, it is ready to be used. You can now roll it out, shape it, or wrap it in cling wrap to use later. Well-wrapped fondant can be stored in a cool room or in the refrigerator, and needs to be kneaded until supple before later use.


Storage:
Wrap the fondant in plastic wrap and store it in airtight container in room temperature

Swiss Meringue Buttercream

Swiss Meringue Buttercream 

Yield: Approximately 3 1/2 cups
Recipe Source: Bakers Royale

Ingredients:

  • 5 large egg whites
  • 11/2 cup sugar
  • 4 sticks unsalted butter, sliced and softened
  • 1/4 teaspoon salt

Directions:

  1. Combine egg whites and sugar in a stand mixer bowl and place it over (not on) simmering water. Heat mixture to 160 degrees F while whisking constantly.
  2. Transfer mixer bowl to stand mixer, fitted with a whisk attachment and beat on medium high speed (speed 8 on a KitchenAid stand mixer) until mixture cools, doubles in volume and forms stiff peaks; about 10-12 minutes. 
  3. Add butter in one piece at a time, mixing to incorporate after each addition. The mixture may appear clumpy and almost curdled looking at first—this is normal. Keep mixing and it will become even and smooth again.
  4. Add salt and flavoring, mix to combine.

Persimmon Mousse Cake 富有柿慕斯蛋糕

November is a birthday month. Many of my friends have their birthday in this month. My birthday is also in November too! I made this cake to combine celebration of their birthdays - Ben and Joe. Wish them all the best and have a wonderful birthday celebration. 

I did this cake before. I did it in mousse, pudding and cake forms. And here is the recipe from my previous Persimmon Mousse Recipe.

Ingredients: (8" square pan)

3 persimmon (Large)
1 1/2 cup whipping cream (whipped)
3 egg yolks
9 tbsp sugar
1 cup milk
1 1/2 tbsp of gelatine
5 tbsp water

Directions:

Prepare cake base from any of your favorite recipe or from Cake mix. Then prepare the persimmon mousse cake portion here:
  1. Peel and seed persimmon. Finely chop the flesh. Puree in a blender
  2. Pour gelatine in water and heat over a hot water bath. Stir until they dissolve completely 
  3. Whisk egg yolk and sugar in a bowl over hot water until satiny and thick.
  4. Bring milk to the boil. Turn off the stove. Put in the egg yolk from step(3) and mix well . Bring to the boil over low heat. Turn off the stove. Save the mixture in a mixing bowl.
  5. Fold in gelatine solution from step (2). Leave it to cool. Add persimmon puree (step 1) and fold in whipped cream. Pour over cake base. Refrigerate until set. Serve Cold.
(Optional) I use orange jello for top coat as decoration. Just follow the jello package directions. Pour your jello in thin layer on top of cake (no more than 0.5 cm thick). Refrigerate until set. Or you can serve as-is. 

Pumpkin shape Pumpkin Spice Rice Krispie Treats (Halloween treats)

This year our church's youth/kids fellowship department organized a Halloween day event called iCarnaval. It has game booth, real person Mario Kart Show and fireworks etc. I was asked to help to make a dessert treat for up to 100 kids + some adults. Therefore, I chose this Rice Krispie treats as dessert treats. It is always all time kid's favourite snacks. I made around 140 bite size Pumpkin shaped Rice Krispie treats. I doubled the amount of the recipe below.


Pumpkin Spice Rice Krispie Treats 

(made around 70 mini pumpkins - 1" size)

Ingredients:


3 tablespoons unsalted butter
1/4 cup canned pumpkin puree
1 (10 ounce) bag mini marshmallows plus one cup
1/4 teaspoon pure vanilla extract
1/4 teaspoon ground cinnamon
Pinch of allspice
Pinch of freshly grated nutmeg
Pinch of kosher salt
7 cups crispy rice cereal
some orange food colour
35 Pretzel sticks (divided into half to make 70)
Green buttercream icing


Directions:


In a heavy saucepan or Dutch oven, melt butter over medium-low heat. Add the pumpkin puree and continue to cook until it is warmed through. Fold in 10 ounces of the marshmallows, stirring frequently until almost completely melted. Stir in vanilla, cinnamon, allspice, nutmeg, and salt, and remove from heat. Add a few drops of orange food colour at this time and stir until all mix.

Allow the marshmallow mixture to cool 10 minutes; fold in the remaining cup of marshmallows.  Continue to cool the mixture for another 20 to 25 minutes until it is room temperature (failure to cool the mixture will result in soggy rice crispy treats.) Add the puffed rice cereal and stir, using a silicone spatula, until combined.

Assembling:

Pick an one inch ball size of mixed rice cereal and model to a ball shape. Take half of Pretzel sticks and put into the top of pumpkin as stem. I use green buttercream icing to pipe one leaf beside the pretzel to looks more like a pumpkin.Repeat until all rice cereal have been used. It can make at least 70 mini little pumpkin.

Pumpkin spice rice krispies square recipe adapted from: http://www.thekitchn.com/recipe-pumpkin-spice-rice-krispie-treats-recipes-from-the-kitchn-159672